Skip to content
Home / News / Step by Step Guide to Photograph Earrings for eCommerce

Step by Step Guide to Photograph Earrings for eCommerce

https://picsera.com/step-by-step-guide-to-photograph-earrings-Picsera

How to Photograph Earrings for your Jewelry Business

Each type of jewelry has its own set of challenges. They arise mainly from the complexity of the shape and material, making it tricky to place properly for photography. Earring photography is one of the hardest to get perfect because they are small, some dangle, and their shiny surfaces add another set of shooting issues. If you want to know how to photograph earrings like a pro, this article’s especially for you.

Considering that jewelry photography is tough even for pros, we have created a series of easy-to-follow articles to guide our ecommerce clients to shoot beautiful jewelry photos. These techniques were put together by our professional photographers, and are often used in our photography studio while shooting our client’s jewelry. Last time we covered how to shoot rings, today we’ll walk you through the steps on how to photograph earrings that look like they’re floating. This technique will allow you to capture details of the front, back, and side of your earrings. We’ll cover how to shoot dangles or leverback earrings and studs. Let’s get started!

Picsera

Outsource Jewelry Photography Services

Picsera offers jewelry photography and retouching, so you can focus on your business instead. Spend a fraction of the cost, time, and effort of jewelry photography with Picsera. Click here to find out more.

Taking Earring Pictures of Dangle or Leverback

We’ll cover two ways of taking pictures of earrings that are dangle or leaverback-type: with an open frame and with an earring holder. Our preferred set up is with the open frame, but try both and discover what earring photography works best for you.

Shooting with an Open Frame

1.) Prepare your photography studio setup

Set up the lighting and your light tent. Get everything just right. For more info on setting up your studio visit our article on Shooting Jewelry on a White Background.

2) Set up the open frame

This is a metal open frame, you can easily find one in a crafts store such as Michael’s. Make sure the frame is securely positioned inside the light tent and well-balanced using a couple of clamps-use the picture below as a reference. You don’t want it to fall over in the middle of shooting earrings photos.

3) Use transparent threads

It’s now time to clip transparent threads to your frame. You can use a fishing line for this if you have it handy. If you are using an open frame, you can also tie the thread to the frame, but it’s more difficult to make the threads tight once you add your earrings.

4) Attach your earrings to the threads

This may take some time. You want to tie the earrings securely to the frame, and it may require a few threads to ensure that the earrings don’t sag on the frame. You want the whole set up to be very tight and the earrings to be suspended within the frame. It’s important to remember to keep the earring as straight as possible within the frame. Hanging earring images are usually hard to achieve. You can choose to attach only one earring to the frame. It will save you some time because the second earring can easily be duplicated in Photoshop. We can perform this action quickly and efficiently when we edit your images.

5) It’s time to set up your camera

Open Fram to Shoot Earrings

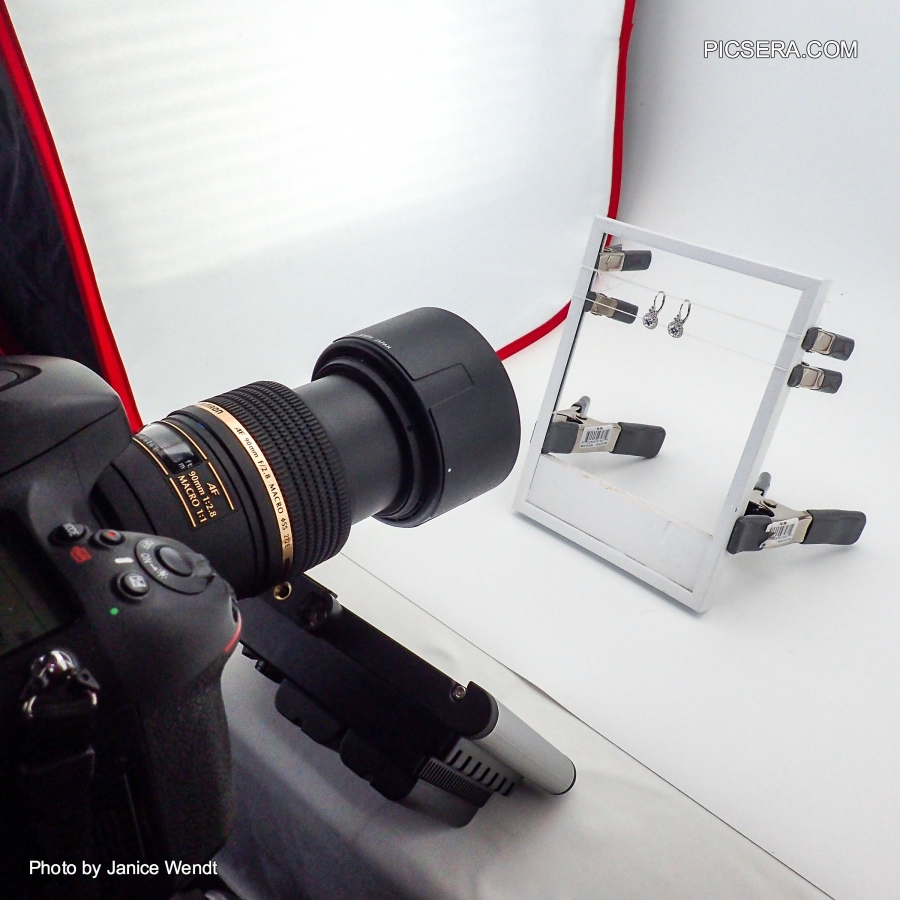
Set up your camera a short distance from the earrings and earrings stand. You want your product to fill the frame. Leave some space around the edges so you can adjust the cropping of your image but make sure the earrings take up most of the frame.

7) Add a small LED light for additional brightness

To help capture the tiny details on your earrings, use a small LED light that’s not too bright. The best way to photograph jewelry is to take into consideration the intricate details that make your pieces stand out. 

How to Photograph Earrings with an Open Frame

8) Adjust your exposure

Be sure to meter your camera off of the jewelry not off of the white background. You want a bright white background and well-exposed jewelry. The white background can fool the camera into thinking the shot is too bright. Remember you want to expose your image for the jewelry. That background will be a little overexposed, but that’s okay.

clothing photography

Photography Coaching Via Zoom

Feeling a little overwhelmed even with the step-by-step guide? Even with the right tools, earring photography is challenging. Get access to the basics, tips, and secrets to taking picture-perfect earring photos with Picsera’s Jewelry Photography Zoom Coaching. Click here to find out more.

Shooting with an Earring Holder

How to photograph earrings with an earring holder? That’s easy- you can use the setup for open frame photography but some changes on how to display earrings. You’ll also need to make a few adjustments to your jewelry lightbox photography.

1) Attach the earrings

You will want to attach both pieces to the earrings holder. Make sure they are evenly spaced from the edges of the holder and are positioned nicely. 

2) Arrange your Lighting

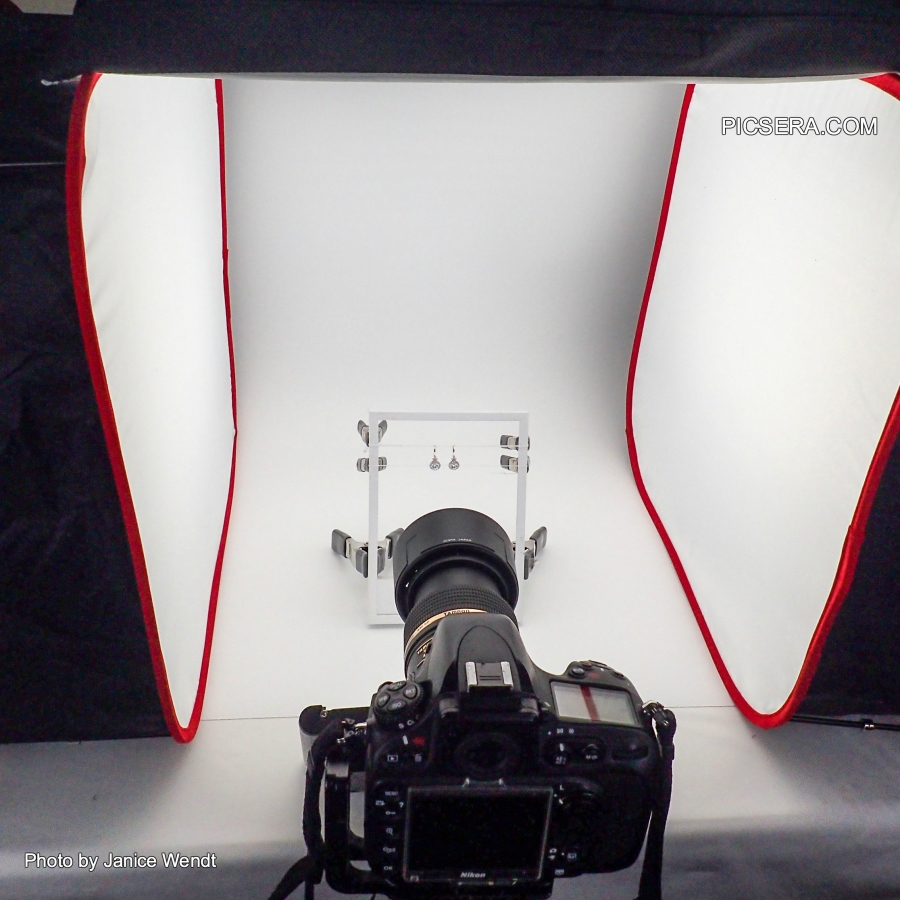
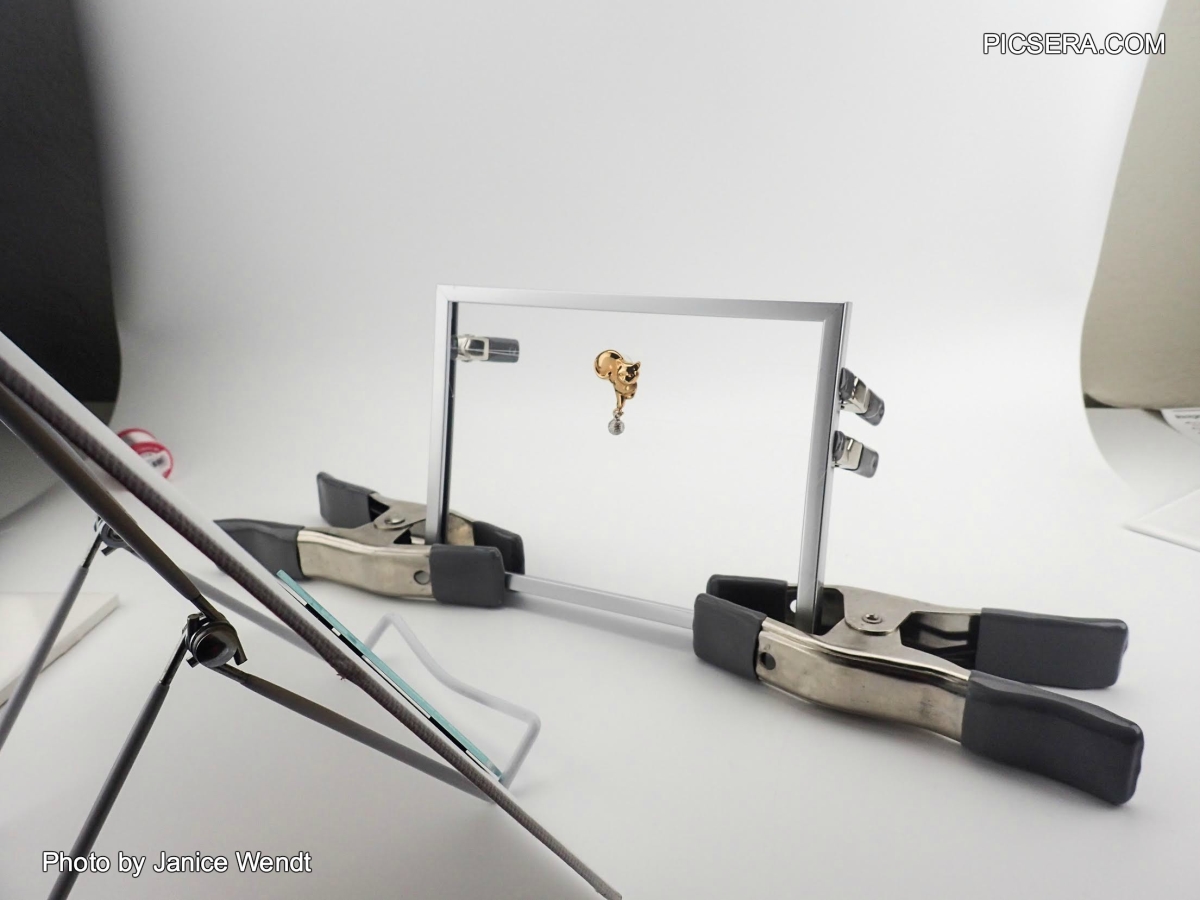
In this case, the lighting should be angled in such a way to create a sense of airiness. You will need to angle the light slightly. It is also recommended that you use reflectors that are positioned below the earrings and reflect light back up towards the jewelry. The photo below doesn’t show an earring holder, but it showcases how to position a mirror (in front of the earring) to reflect the light onto the jewelry.

How to Shoot Earrings by Picsera

After a little practice, you will see just how the light can create a mood within an image. Keep practcsing until you get this set-up correct.

Shooting Stud Earrings

This earring photography set is almost exactly like shooting dangles on an earring holder with only minor adjustments in how to display earrings. The shape of the earrings makes it extremely difficult to photograph the earrings from a frame in a suspended position. You will need to use an earring holder when capturing images of studs.

1. Place the earring holder in the light box

Get a white or transparent earring holder and place it inside your lightbox. This is to ensure that the pictures of earrings you take are focused on the jewelry. Studs are usually smaller, so subtle earring holders are recommended to keep the spotlight on the earrings.

2. Mount the Studs

Carefully mount the studs on the transparent or white earring holder. Be sure they are arranged evenly on the holder, and they are carefully secured. Check the earrings to be sure there are no fingerprints once you start with your jewelry photoshoot.

Now you can quickly and efficiently shoot the studs. Make sure you mount them as a pair. It’s difficult to insert the other earring into the frame using Photoshop.

The End Results

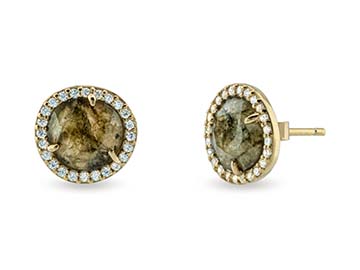
The easy step-by-step guide above can help you get top-notch pictures of earrings like they were taken by a pro. Real-life samples of earring photography below were photographed and edited by Picsera’s team for one of our jewelry clients. Photo editing services included adding shadows, enhancing diamonds, among other things. These retouching and editing techniques help enhance the image quality and the attention to detail.

Stud Earring Photography by Picsera

Earring Photography by Picsera

There you have it!!

Who knew earring photography, once described as daunting and hard to achieve, can be as easy as pie? This guide shows how to photograph earrings without all the intimidation and complications. If you need more information on setting up lighting and purchasing the right equipment, take a look at our other articles on product and jewelry photography. We are here to help ensure your products look their best.

Jewelry Photography Tips for the Non-Pro

Easy to Follow Product Photography Tips for Ecommerce Businesses

If you need some inspiration, check out this handy Pinterest collection. You can also take a look at this video. You’ll be able to see first-hand how a professional photographer sets up for a photo shoot.

Next Level Earring Photography with Picsera

Even when you master the tips above, your raw takes might not be enough to fully capture the beauty of the small details of the jewelry. Want to know how to elevate your earring photography?

Outsource Jewelry Retouching with Picsera

And because you’ve just gotten the insider on earring photography, don’t stop at that. Get high-quality earring pictures with Picsera’s jewelry photo retouching services. Perfect the color, the shine, and all the tiny details that matter. Don’t spend any more time learning this complicated Photoshop process. Picsera can help you make your earring photography better, fast! And, with amazing rates that are worth every cent.

Get a free quote for jewelry photography or editing here >>>

Earring Photography Coaching via Zoom

Sometimes, all you need is proper guidance to help you achieve top-notch earring pictures. You don’t have to buy those expensive cameras and enroll in those lengthy photography classes. With Picsera’s Jewelry Photography Coaching all done through Zoom, you can easily learn all the industry secrets and tips that will help you take amazing earring photos.

Jewelry Photography and Retouching

For people who don’t have the time for photographing their own earring products, or for those who simply don’t have the time to learn it, Picsera can help. Outsource earring photography and retouching with us so you can focus all your energy into growing your business. You’re masters at your own craft of jewelry-making, we’re masters at producing top-notch jewelry images.

Did Someone Say FREE Trial?

Experience high-quality retouching from one of the most trusted editing service providers. Picsera’s jewelry retouching services will help you get higher sales conversion with impressive and unique product visuals. Start your free trial NOW!