Skip to content
Home / News / How to Photograph Rings for eCommerce

How to Photograph Rings for eCommerce

Learning how to photograph rings is part art and part science.  Rings are beautiful, sparkly pieces of jewelry that people love to wear. But they are also small, finicky little items to photograph because of their tiny, intricate details. As with most trades, a craftsman is only as good as his or her tools.  Jewelry photography is no exception.  If you don’t have the right tools when you go to shoot, you will wind up disappointed with your final images.

Sure you can fix up images in post-production with great photo editing, but the recipe for truly stunning images is great photography plus great photo editing. Today we’ll show you how to photograph rings that showcase the value of your jewelry, create a great buyer experience, and entice your customers to purchase your items.

Picsera-logo

Outsource Ring Photography

Want a faster solution to your ring imaging needs? Outsource with Picsera to have a reliable partner take care of all your product visualization needs, from ring photography to editing and retouching. Click here to find out more.

Now let’s get down to business and talk about how to photograph rings for eCommerce.

Photography Equipment and Props You Need to Shoot Rings Properly​

1. Macro Lens

Rings are very small items, so you’ll need a special lens to get close to the jewelry and capture the details your customers would be able to see in person. The ideal lens to do this job is a macro lens on a DSLR. We use the Tamron SP 90mm macro lens to shoot in our product photography studio. Without a quality lens like this you would otherwise need to zoom in and crop the image tightly, but doing so would result in a lower quality image. Alternatively, you can choose to purchase extension tubes that turn your kit lens into a macro lens. This is a more economical choice than the macro lens. The extension tubes attach to your lens and allow you to get closer to an object while still maintaining a sharp focus.  Use this link to view all the available extension tubes from B&H.  You will need to select the set or single extension tube that works best for your camera make and model.

2. Light Box or Shooting Tent

A light box or shooting tent will allow you to capture and bounce light evenly onto your jewelry. Thus, giving it more shine, definition, and focus. We recommend the Amazon portable studio. It’s very light, affordable, and easy to use; however we usually add more light to further enhance the look of the rings. A shooting tent is a lower cost alternative and is popular with all types of light sources including daylight.  We recommend the Impact Digital Light Shed. The small version will easily accommodate all rings.

3. White Tile

White tile is an ordinary, white ceramic piece of tile you can purchase at any home improvement store. The main purpose of this prop is to allow more light reflection for certain shots. 

4. Hot Glue Gun

A hot glue gun is key to maintaining your rings in the proper position while shooting.

5. Small Mirror

A small mirror is ideal for adding even more light to your jewelry pieces.

6. White Reflectors

White reflectors are used to fill in shadows more softly than mirrors.

7. LED Lights

Creating a broad, soft light is important. Two sets of LED Lights outside a shooting tent will make for soft, diffused light. You can add even more diffusion if you place the LED lights inside a Softbox. To add sparkle to your stones we recommend using a small lower power portable bank of LED lights without a diffuser. Use this to add character to your stones and jewelry. It will give you a nice twinkle. When selecting LED lights be sure they are all the same color balance rating.  Daylight balanced lights work best since the lights can be used in conjunction with window light to add nice fill light.

Now that you have all your photography equipment and props ready, it’s time to begin the photo shoot!

Prepping the Rings for the Photo Shoot

I think we’ve mentioned this tip in every jewelry article we’ve shared, but that’s because it’s really important. Shiny objects need to be spotless. Fingerprints, dust and other blemishes will be incredibly obvious in your photographs. It’s time-consuming to remove these blemishes in post-production processing, so avoid the frustration and make sure each item is carefully cleaned. We recommend that you handle all jewelry with white cotton gloves to ensure it stays clean.

Online Photography Coaching

Ring Photography Zoom Coaching

Not yet sure how you can do all this, especially with multiple necklace designs you carry in your collection? Picsera’s zoom coaching can help you fast with your DIY ring photoshoot. Click here to know more.

Time to Shoot Your Rings

There are several ways of arranging a ring to create a beautiful image. Use your judgment and choose the type of setup that best suits your brand and products.

1. Position the Ring on the Tile

This is a secret pro tip! The white tile will help you get a white background and increase the light reflection on your ring, which will make your stones sparkle.

Use a small piece of jeweler’s putty or hot glue on the band of the ring to secure it in a standing position on the ceramic tile. This is a really beautiful way to arrange a ring to ensure buyers will be able to see all of the amazing details in your ring.

Positioning a Ring for a Photoshoot by Picsera

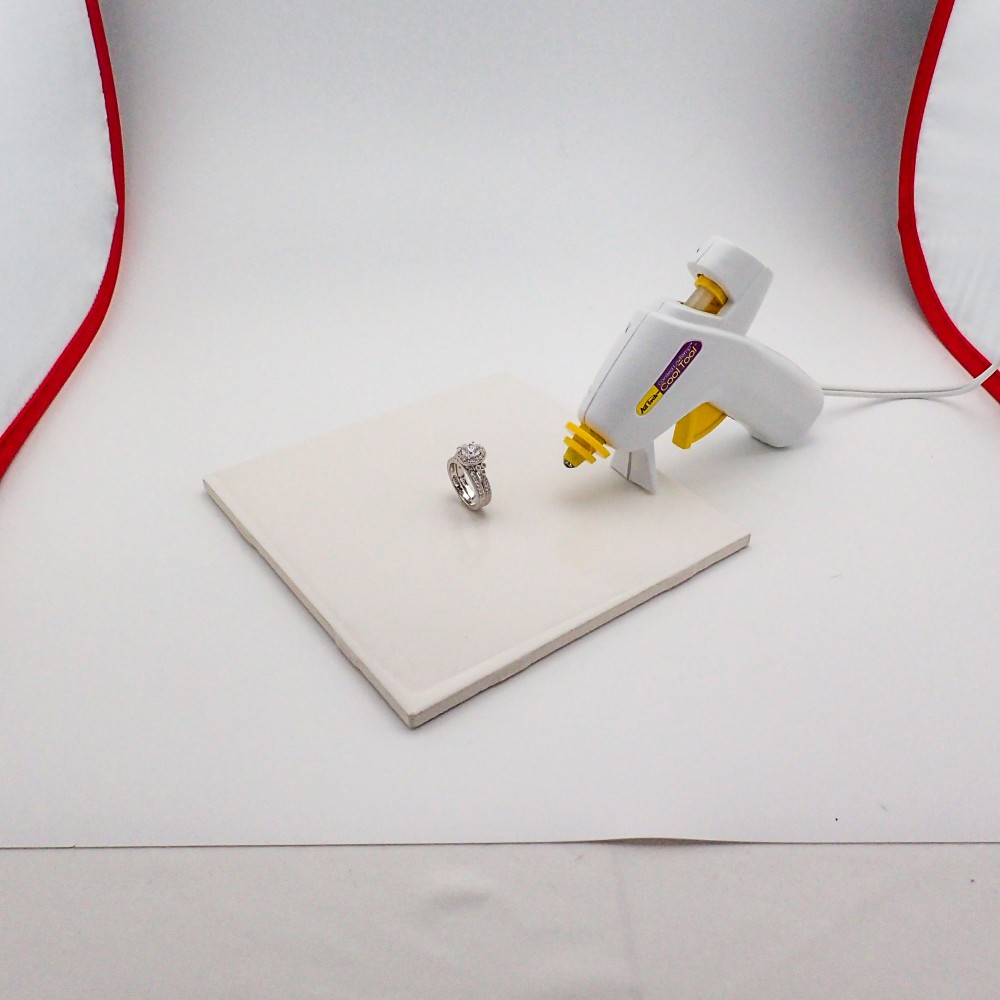
Use a tiny amount of glue on the lowest possible setting to attach the ring to the tile. You don’t want to damage your product. Just be sure when you are mounting the ring on the tile that you get it to stand straight up and down. It looks less professional if the ring is mounted on a slight angle.

2. Position the Mirror

Once the ring is securely mounted on the tile, put the mirror upright on the mount and position it on top of the white tile as shown in the image below.

Ring Setup for Photoshoot

3. Use a LED Light for Sparkle

Position a small LED light off to the side of your products. This light will enhance the shine and sparkle of your jewelry. Play around with different angles until you achieve the desired look. Check out the photo below for a creative approach to positioning reflectors and lights.  Finding the right angles and lighting will help you achieve that bright, glowing look that’s so appealing in jewelry photography.

 How to Photograph Rings by Picsera

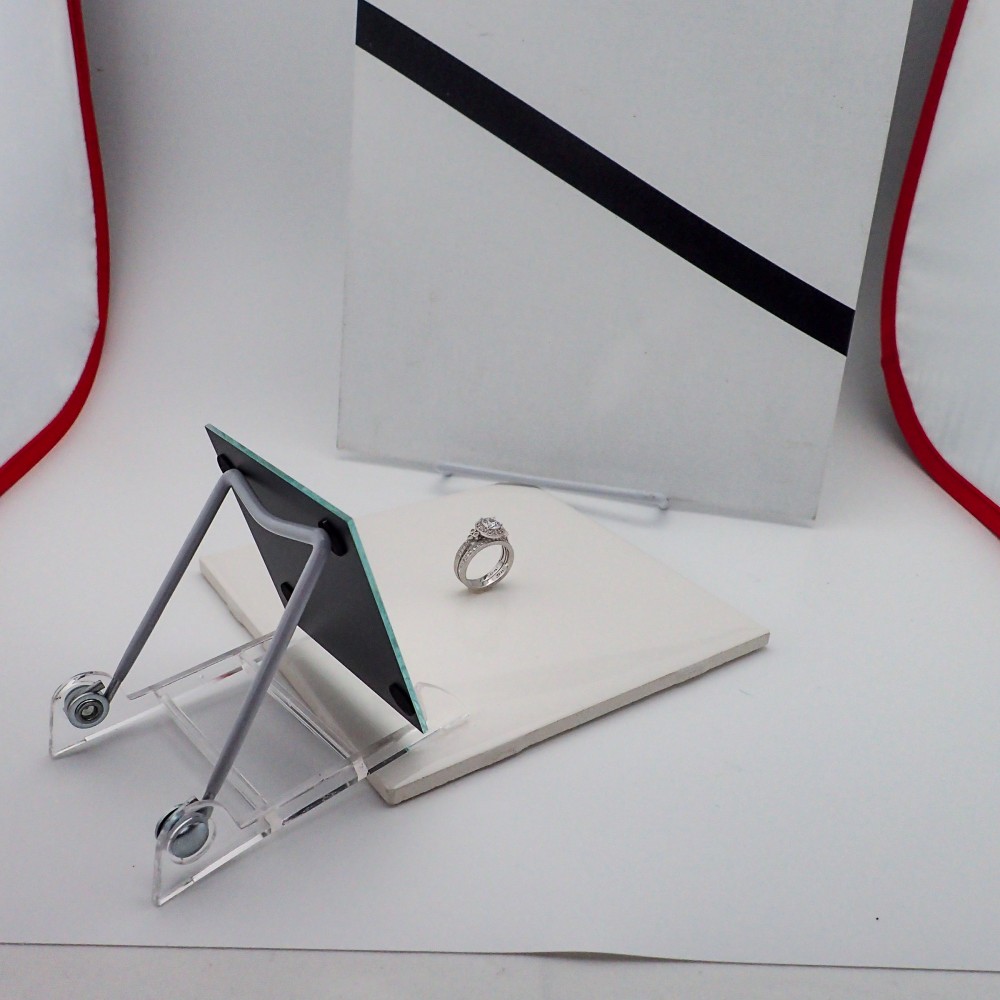
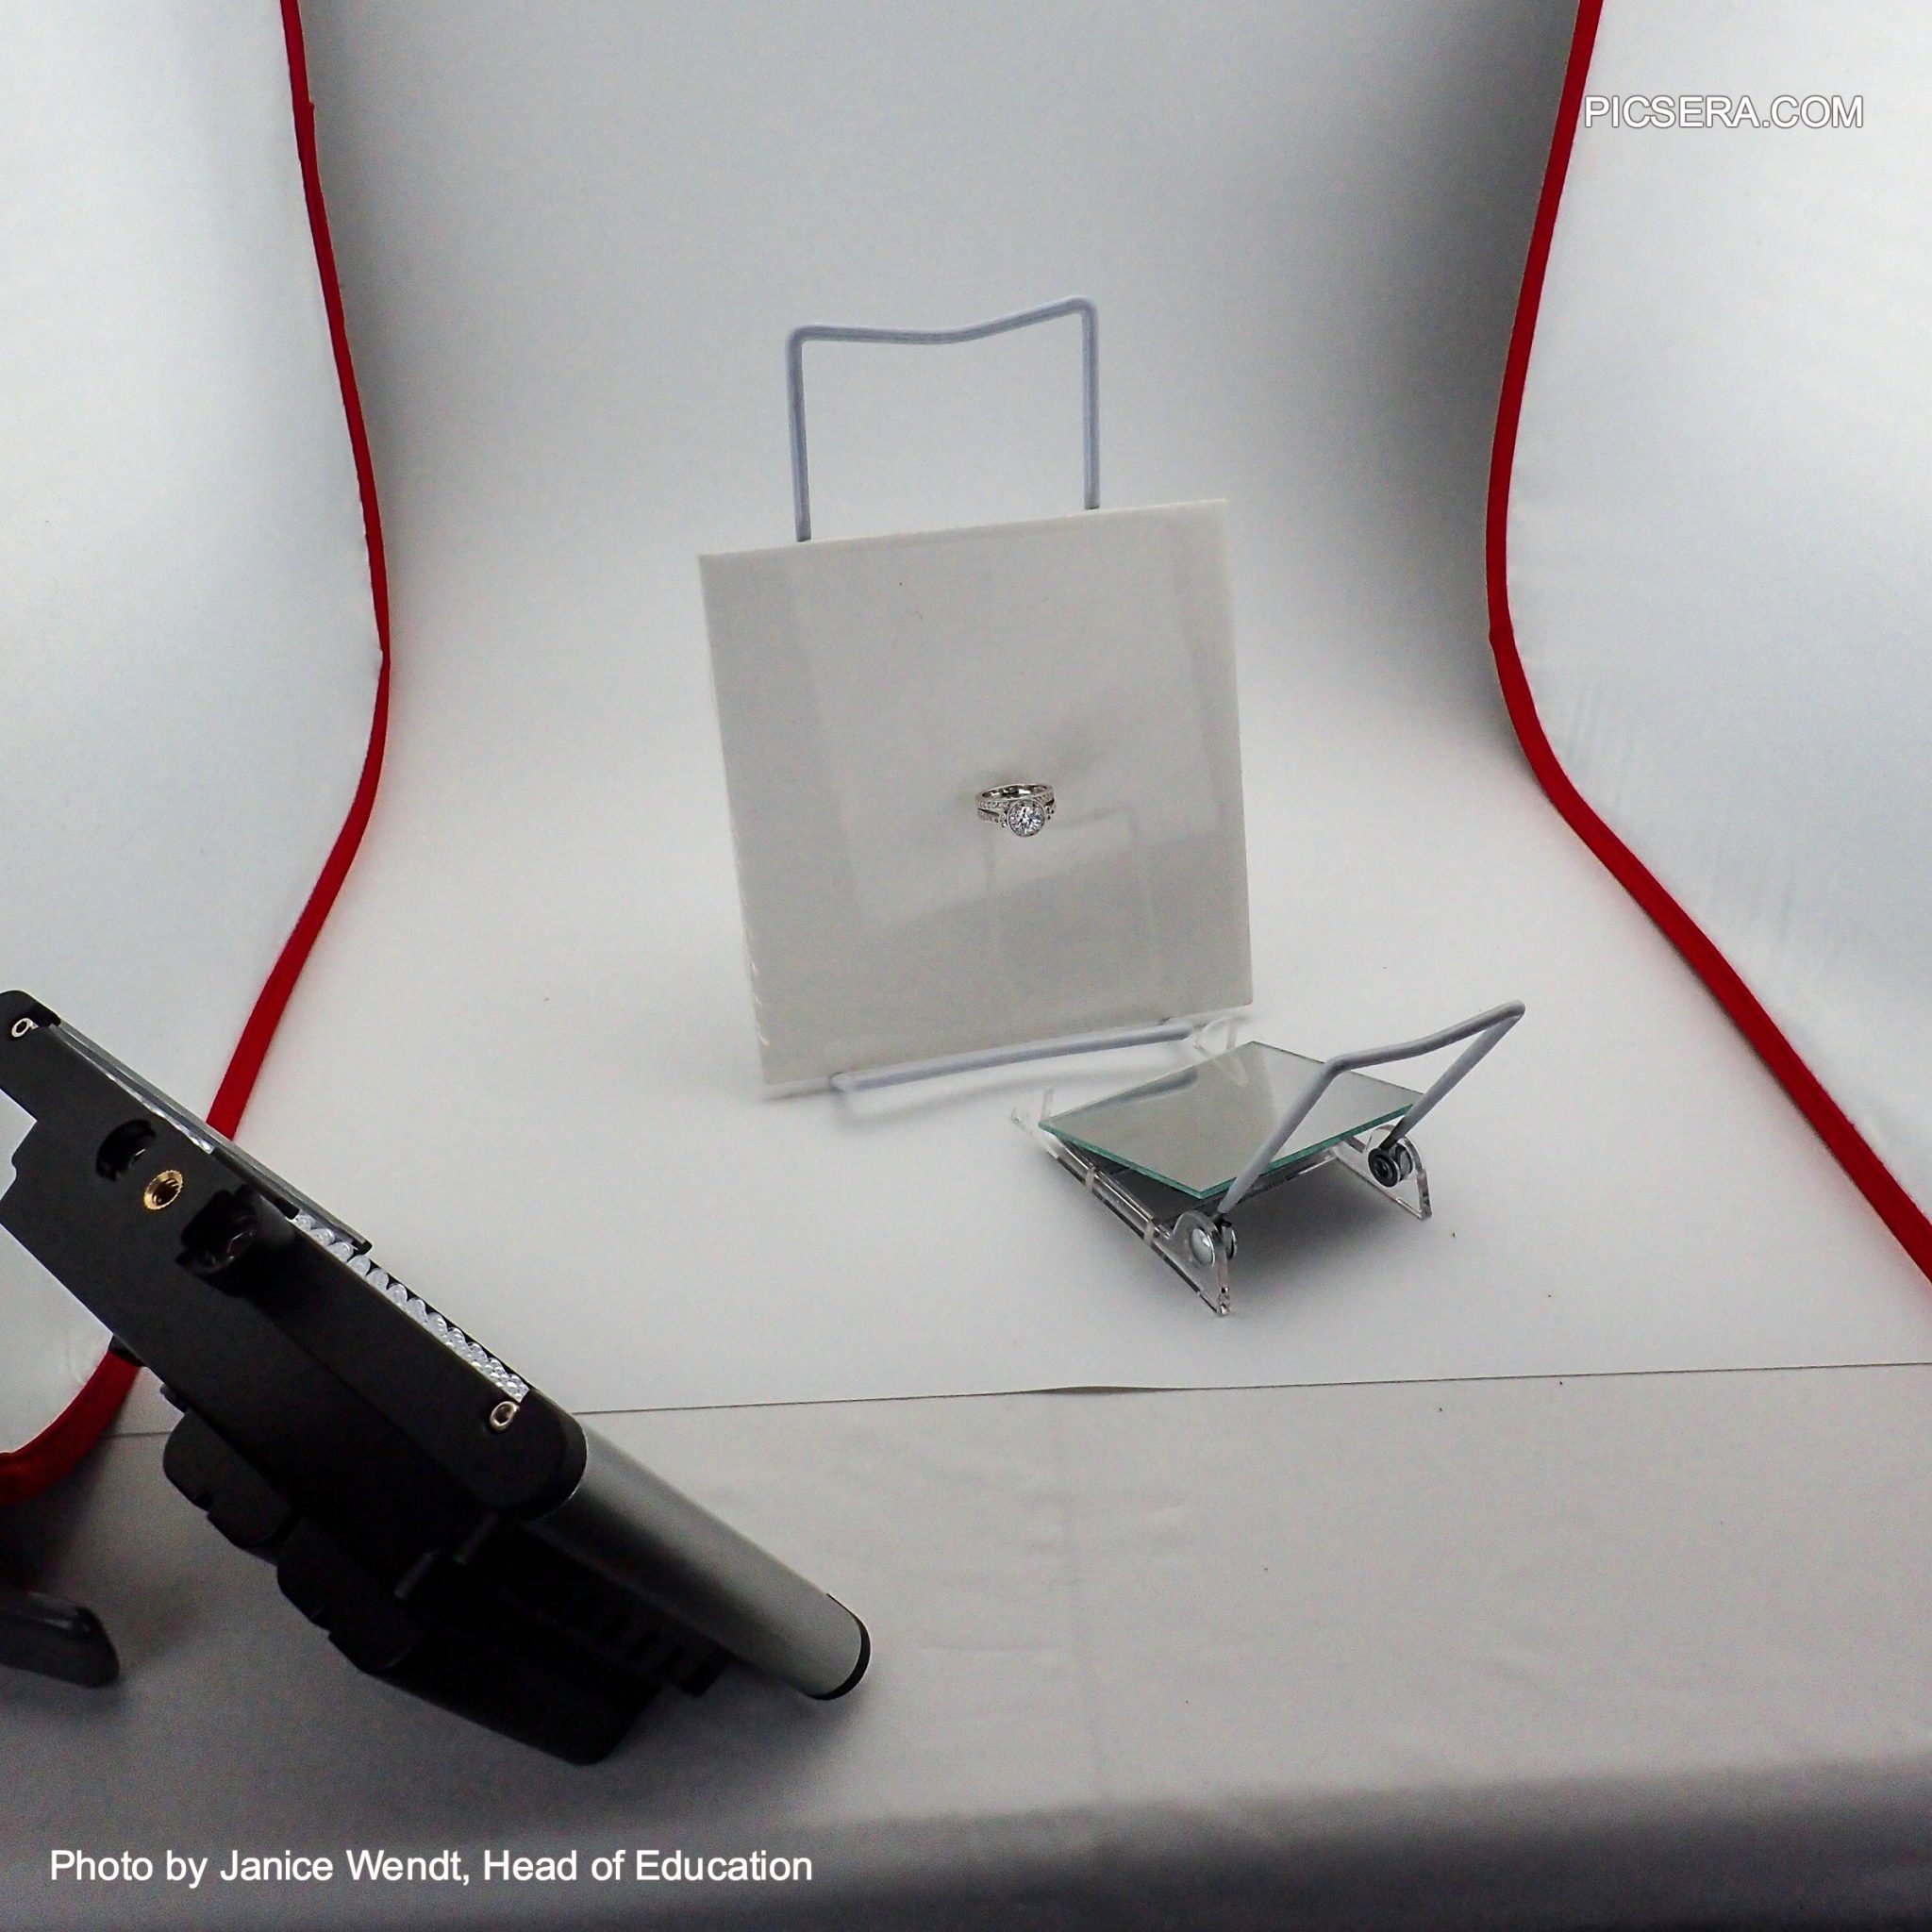
Take photographs of the ring from various angles by carefully rotating the tile. You can also adjust the angle of your camera to try and catch a reflection from the acrylic tile. We also recommend that you use mirrors to help reflect light back onto the product and create some sparkle in your jewelry.

Pro Bonus Tip: Use a Gray Card!

A gray card will allow you to achieve true colors in your images. Your photo editing team can use it as a guide for color correction and retouching. It will allow you to achieve a brilliant white color that doesn’t create false tones over your bright, shiny jewelry. To learn more about why this handy tool is so important and for tips on how to use it, check out our article on Achieving True Colors in Your Images.

Ring with Grey Card by Picsera


The Final Result

Once the photoshoot is completed, upload the photos to DropBox or a similar file sharing tool for easy storage and faster sharing capabilities.  The jewelry photography shoot is officially now complete and it is time for photo editing to begin! Even the best looking photographs can benefit from extra editing. Look at our final edited image below:

Ring Photo After Post Production by Picsera

In post-production there are a number of additional options to further enhance your images and save you time. Once of the most common post-production techniques is color replacement. If a certain ring style is offered in different colors such as white gold, yellow gold and rose gold, the images for the additional colors can be created in post-production.  By taking this approach, you can shoot a ring style once instead of multiple times, which can save you a significant amount of time.

Summing It Up - How to Photograph Rings for eCommerce

We’ve come to the end of this article on how to photograph rings. We hope that you can use our tips to help you shoot fantastic images of your products. If you need additional help editing or shooting your jewelry, don’t hesitate to contact us. We can take your photos and make them look even more amazing with editing, or we can help you with the entire photography and editing process.

Learn more about Picsera’s Jewelry Photography and Retouching Services HERE

Did Someone Say FREE Trial?

Experience high-quality retouching from one of the most trusted editing service providers. Picsera’s jewelry retouching services will help you get higher sales conversion with impressive and unique product visuals. Start your free trial NOW!